Tech Talk: Using The Seakeeper Gyro User Interface
In this episode of Tech Talk, Chase is going over the Seakeeper user interface. The new UI combines Seakeeper Ride and Seakeeper Gyro for fast and easy control of both Seakeeper systems through a single Garmin One Helm Application.
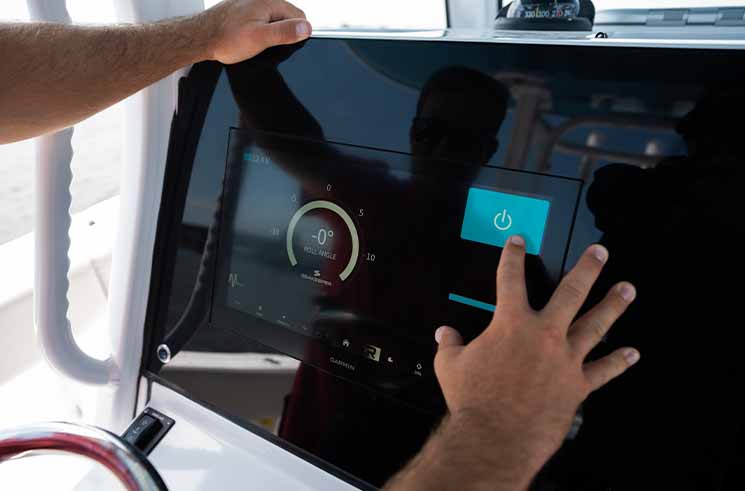
Navigating the Seakeeper Gyro user interface can sometimes be a bit daunting, but with a little guidance, you'll be a pro in no time. We will walk you through the basic functions and features of this one-helm device.
Getting Started:
Power Up: To begin, locate the power button on your MFD. Once you press it, the system will start spooling up. The system's status is indicated by the color of the power button: gray means it's off, while green indicates it's on.
Engagement: When the system is approximately 3/4 spooled, a boat rocking icon will appear on your screen. This indicates that the seat keeper is ready to be engaged. Simply tap the icon to activate it.
Key Features:
Roll Angle: The center of your screen will display the current roll angle of your boat. This information is crucial for understanding the boat's stability and making adjustments as needed.
Battery Voltage: Keep a close eye on your battery voltage, as it directly powers the seat keeper gyro. Low battery voltage can affect the system's performance.
Seakeeper Ride Screen: Easily switch between the gyro and ride screens by tapping the "S" button. The ride screen provides access to additional features like trim tab adjustments.
Heartbeat Indication: For a visual representation of system workload, select the heartbeat display option. This can be helpful for monitoring the system's health and identifying potential issues.
By understanding these basic functions and following the tips provided in this guide, you can effectively utilize the Seakeeper Gyro user interface and enhance your boating experience.
